For many autistic children, a sensory room (or corner) can reduce overwhelm, support self‑regulation, and make home life calmer. This guide shows you exactly how to create one—step‑by‑step, on any budget—plus safety tips, checklists, and DIY builds you can finish in an afternoon.
What Is a Sensory Room?
A sensory room is a dedicated space—sometimes just a corner—designed to provide the right mix of visual, tactile, auditory, vestibular (movement), and proprioceptive (deep pressure) input. The goal is to help your child feel safe, calm, and better able to self‑regulate.
Key Benefits for Autistic Children
- Lower sensory overload and anxiety
- Support self‑regulation and transitions
- Improve focus for play, reading, or homework
- Create a predictable “escape” when overwhelmed
Core Elements (Calm vs. Stimulate)
Visual
- Soft, warm string lights or dimmable lamps
- Blackout canopy/tent for low‑stim “cocoon”
- Avoid overhead fluorescents and strobe patterns
Tactile
- Textured wall panel (fabric, foam, silicone tiles)
- Fidget baskets: putty, chewables, textured balls
Auditory
- White noise or nature sounds at low volume
- Noise‑reducing headphones nearby
Movement & Deep Pressure
- Small indoor swing/hammock (if safe & anchored)
- Peanut ball or wobble cushion
- Weighted lap pad/blanket (age‑appropriate)
Budget & DIY Ideas (Under $100)
- Lighting: Warm fairy lights + dimmer; paper lantern lamp
- Calming nook: Pop‑up tent or canopy + floor cushion
- Sensory bottles: Clear bottle + water + glitter + glycerin
- Texture board: Foam squares, faux fur, corduroy, silicone trivet
- Sound: Free white‑noise app + simple Bluetooth speaker
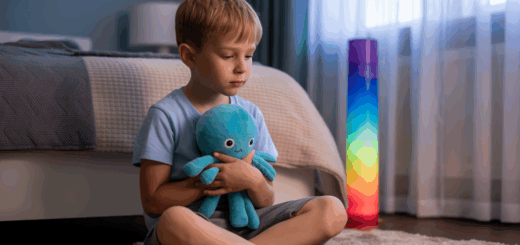
How‑To: Build a Calming Corner (Step‑By‑Step)
- Pick the spot: low traffic, away from harsh lights/smells.
- Define the space: use a canopy/tent or a room divider.
- Soft base: foam mat + washable rug + large floor cushion.
- Layer inputs: dimmable lamp, one texture panel, a lap pad.
- Choice basket: 3–5 preferred fidgets/books (not a pile).
- Rules: “This is a safe, quiet place”—add a simple visual card.
- Iterate weekly: swap 1–2 items based on your child’s cues.
How‑To: DIY Sensory Bottle (Quick Build)
Materials: clear plastic bottle with tight cap, warm water, glitter, glycerin or clear glue, optional food coloring, funnel, hot glue.
- Fill bottle ⅔ with warm water. Stir in glitter and a little glycerin/glue.
- Add color (optional). Top up with water, leaving a small air gap.
- Seal cap with hot glue. Test flow; add more glycerin for slower swirl.
- Label and store safely. (Tip: watermark photos with “101autism.com” in the lower‑right corner.)
Safety & Accessibility Checklist
- Clear pathways; anchor heavy items; round corners; non‑toxic materials.
- Avoid choking hazards; supervise around cords and hanging elements.
- Use dimmers instead of harsh color‑changing/strobe lights.
- Follow weight guidance for lap pads/blankets; consult your OT if unsure.
Starter Shopping List (affordable picks)
- Warm string lights (with dimmer)
- Pop‑up tent/canopy + floor cushion
- Foam tiles/rug + peanut ball or wobble cushion
- Weighted lap pad (age/weight appropriate)
- Fidget pack (textured balls, putty, chewable necklace)
Frequently Asked Questions
What’s the fastest way to make a sensory retreat at home?
Set up a small tent/canopy with a floor cushion, add a dimmable lamp, and place a fidget basket. That trio covers visual, proprioceptive, and tactile needs within minutes.
How can I keep costs under $100?
Prioritize lighting (string lights + dimmer), a floor cushion, and a DIY sensory bottle. Add a small rug or foam tiles for comfort and sound dampening.
Are sensory rooms only for young kids?
No—teens and adults benefit too. Adjust aesthetics, seating, and tools (e.g., noise‑reduction headphones, weighted lap pads for study).
Do I need special equipment?
Not necessarily. Many effective elements are DIY or low‑cost. If you add swings or heavy items, follow installation guidelines and safety anchors.